

We may earn revenue from the products available on this page and participate in affiliate programs. Learn more ›
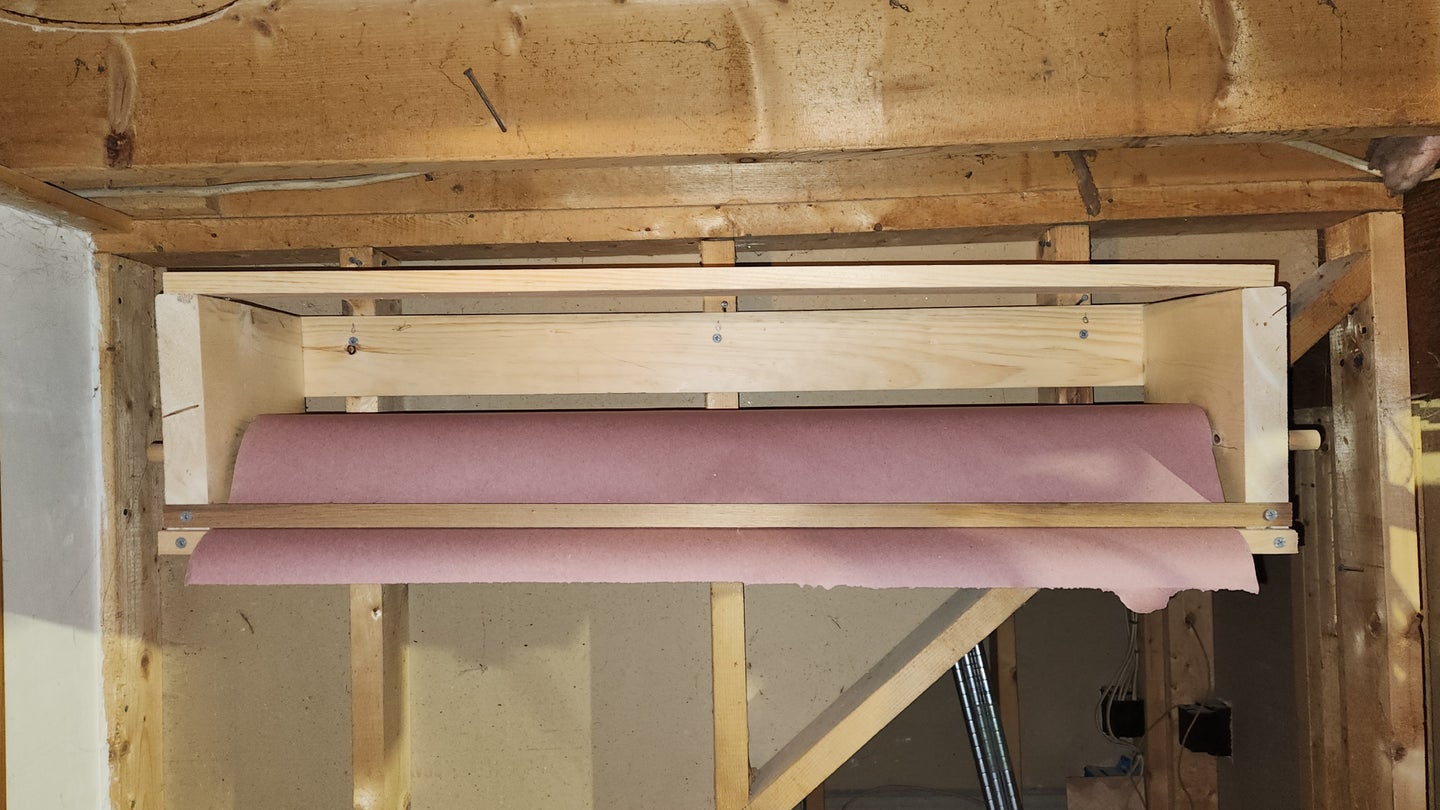
Wood glue is a wonderful thing, but it makes quite a mess if you get it all over your workbench. I like to lay masking paper down before I glue, but it’s a bit awkward to have the roll lying around the shop. To free up some space, I built a wall-mounted paper-hanger, and it’s a design you can modify to store wrapping paper, craft paper, or really any paper that comes on a roll. Now I can pull down a sheet whenever I need one.
Not only that, but I made it entirely out of scrap wood I had leftover from our ongoing garage addition. Because it’s a perfect use for random pieces of wood, you can use any material you have that’s close to the measurements listed below—it doesn’t have to be exact. It’s also built as a shop tool—no frills or nice designs—but there are plenty of ways to fancy it up if you so desire.
Stats
- Time: 1 to 2 hours
- Cost: $0 to $30
- Difficulty: easy
Materials
- 2 (8-to-10-inch-long) 2-by-10 boards
- 1 ( ¾-inch-diameter) wooden dowel, at least 42 inches long
- 2 (40-inch long) 1-by-4 (or 2-by-4) boards
- 2 (40-inch long) ½-inch-wide-by-¼-inch-thick boards
- Wood glue
- 1½-inch wood screws
- 2 cotter pins
Tools
Because my workshop is mostly packed up while we build an addition, I primarily used a circular saw and drill for this project. Absolutely feel free to use a miter saw and/or table saw instead, but it’s good to remember that you can still build things with minimal tools.
How to build a wall-mounted paper roll holder
1. Cut the side boards to size. These side boards hold the dowel that the paper roll slides onto. I made mine out of 2-by-10 material, but scraps of ¾-inch plywood will work as well. Using a circular saw, cut the boards down to equal dimensions. I cut my 2-by-10 material in half, which gave me two 8-by-9.5-inch rectangles.
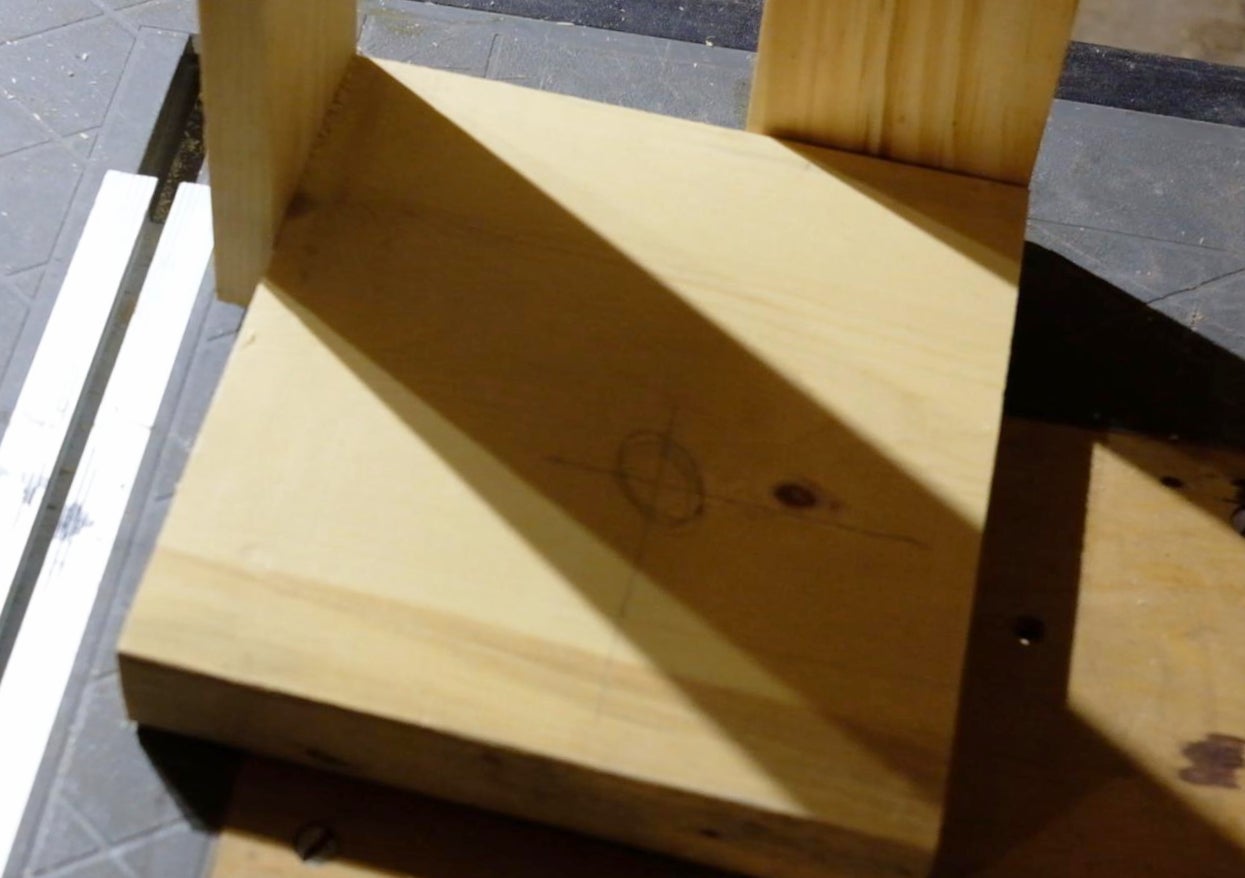
2. Drill holes in the side boards to mount the dowel. Use a ⅞-inch Forstner bit to drill these holes—you want a little bit of play around the ¾-inch dowel so it slips in and out easily. Measure each hole’s location from the front-bottom corner of each side board.
For my roll, which is 6 inches in diameter, I went up 3.5 inches from the bottom, then 3.5 inches in from the front edge to keep it entirely within the frame of the holder. If you’re using a different sized roll, adjust the measurements accordingly.
3. Cut the stretchers that connect the two side boards. The stretchers need to be long enough to leave enough room between the side boards for the paper roll to fit. You don’t want it to be a tight fit, so cut them long.
My roll, for example, is 36 inches long, and the side boards are each 1.5 inches thick, so the stretchers needed to be a minimum of 39 inches long. I cut my 1-by-4 boards to 40 inches to leave a half-inch of breathing room. A quarter-inch would’ve been fine, but any less might cause the frame to squeeze the roll and make it difficult to pull.
[Related: A woodworker’s guide for choosing the right saw for each cut]
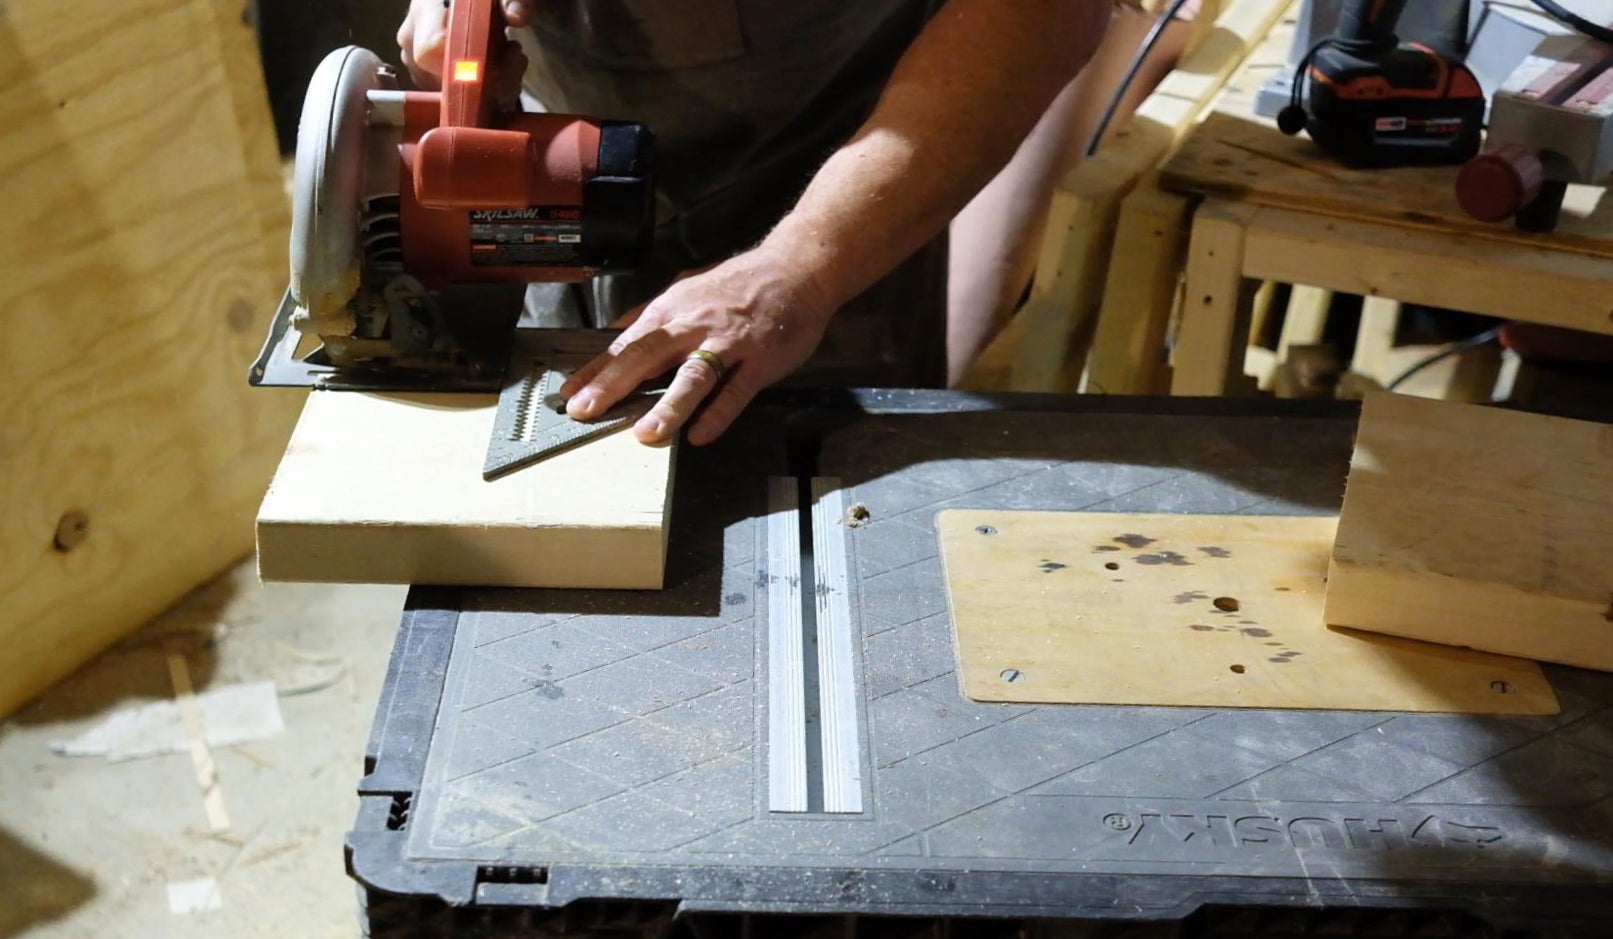
Mark the lengths of the cuts with the speed square, then cut them out with the circular saw.
- Pro tip: After marking the cut line with your speed square, position your circular saw at that mark. Then put your speed square back on the board, flush with the edge and pressed against the saw plate. Use the speed square as a straightedge to get a perpendicular cut that doesn’t wobble.
4. Screw and glue the stretchers to the side boards. Pre-drill the screw holes to avoid splitting the ends of the wood. You’ll want to install one stretcher on the top of the side boards, pushed all the way to the front, and the second on the back of the side boards, pushed all the way to the top. This back board will double as a nailer strip when you hang the unit.
5. Cut the thin front boards that will hold the paper. Cutting boards this thin (40 inches long, ½ inches wide, and ¼ inch thick, in my case) with a circular saw is a little bit tricky to do well, because the vibration of the saw can cause small boards to bounce and vibrate.
One trick is to set your saw blade barely deeper than the thickness of the boards you want to cut, and then put the workpiece on top of some scrap wood rather than hanging off the edge of a work table. When you make the cut, the blade will score the board at the bottom, so make sure it’s not anything you treasure. But it will keep the thin board stable for a safer, cleaner cut.
Or you can do what I did, and cut them with a hand saw.
6. Install the front boards. The purpose of these two thin front boards is to let the paper slide between them. They’ll hold it in place, making it easier to position the sheet while you’re cutting. You can also pull and tear the paper against them if you aren’t particular about nice, clean lines.
Like the stretchers, glue and screw these two boards in place, pre-drilling to avoid cracks. Install one at the very bottom of the front of the unit, and the other about ⅛-inch above that, leaving a uniform space between.
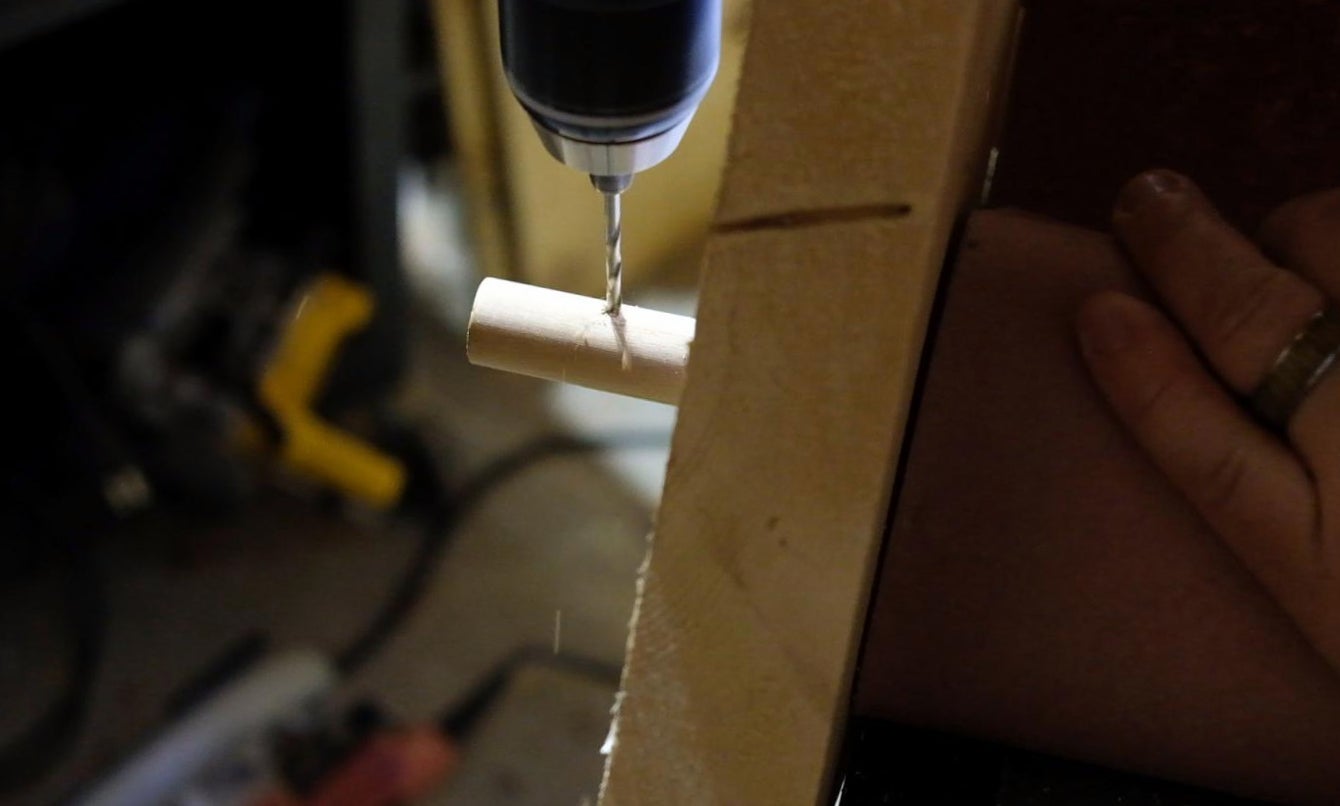
7. Install a cotter pin into the end of the dowel. If the dowel is left unsecured, it’s likely to slide out of the holes as you turn the paper roll. Drill a ⅛-inch hole through the end of the dowel, perpendicular to the ground, and install a small cotter pin. This will keep it from pulling all the way through the holes. You can also use a lynch pin, but you’ll need to drill a larger hole. Likewise, you can use a small bolt and nut, but that will be a bit more time-consuming to remove.
8. Hang the paper roll holder. Locate the studs in your wall, using a stud finder if your shop walls are covered, and then pre-drill holes in the rear stretcher that match those stud locations. Hang the project up with 1 ½-inch or longer screws.
9. Push the paper through the front boards. Once the paper roll is hung, push the paper through the small ⅛-inch gap you left between the two thin front boards. This will allow you to pull through only the amount you want.
I tried to make a cutter head with a razor blade that slides over the paper slot, but it only tore the paper. I couldn’t get an orientation or design that gave a clean cut. My recommendation is to keep a pair of scissors handy, or tear the paper along the edge of the wood.
What you won’t need handy are paper towels to clean up your glue mess when you’re done clamping projects. A clean project, in more ways than one.
The post Clear some space for more projects by building this wall-mounted paper dispenser appeared first on Popular Science.
Articles may contain affiliate links which enable us to share in the revenue of any purchases made.